
Click the links below to jump to specific topics, or scroll through this User Guide for a workflow approach to the Leads module and Action Plan Manager.
Assigning Leads to Action Plans
Creating a Calendar-driven Action Plan
Adding Action Plan Participants
The Three Ways to Schedule Action Plan Activities
(Tokens)
Logging on Return to the top
Log on to the rDesk server . . .
. . . and you will be sent to the rDesk dashboard.
Leads Module Return to the top
The rDesk Leads module allows you to view and manage your Leads. You can view Lead details or filter, sort, group, and export your Leads according to easily selected criteria.
As you work through this User Guide, think of yourself as the User in the screenshots. For example, User appears in the rDesk Dashboard screenshot below (i.e., Source: User Website/Registration).
![]() The new Leads that you
have received are shown in the New Leads
widget.
The new Leads that you
have received are shown in the New Leads
widget.
rDesk Dashboard
Red characters
and shapes do not reflect rDesk screen content. They are annotations
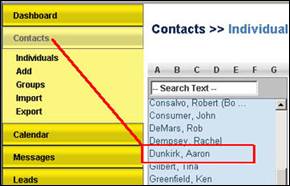
in this help file. To enter the Leads module,
click Leads in the left pane of the desktop, then click View
in the dropdown list as shown by the To
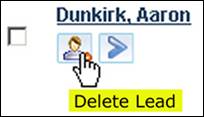
see an icon’s function, hover the mouse pointer over the icon: Click
here to delete a Lead from your Leads list. Deleting the Lead does not
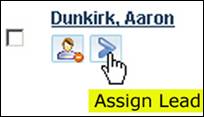
delete the person from your Contacts database. Click
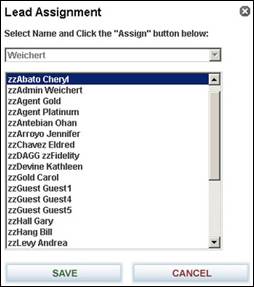
here to assign the Lead to a colleague (via the window below). User here is you.
![]() .
.
(return to Overview)

Leads > View Return to the top
After you click Leads
> View, your Leads are displayed with summary information, as shown
below. Fields are blank where information was not provided when the Lead was
captured.
Leads appear
in the order of the Sort By criteria — in this case, by Last Name in
ascending order.


Filtering Leads Return to the top
You can customize your search results by selecting and entering desired criteria in the filtering pane of the Leads window.
As shown here, you can
filter your Leads by multiple categories in a single search. Remember: ·
You must click the filter name to configure your search
criterion … ·
… and click the checkbox to include
Clicking the Search button will display a summary of your search criteria
with the results.
the criterion in your search.
![]()
This image shows your selections and a summary of your search criteria:
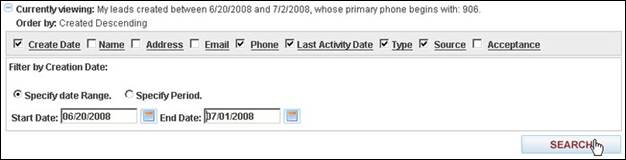
The search above will filter
leads based on all selected criteria (CreateDate, Phone,
LastActivityDate, Type, and Source).
The following images explain the choices available:
Creation Date returns Leads . . . . . . within a specific date range or within the last
“x” days that you specify.

Name returns Leads . . . . . . beginning with the strings you enter for the first
and/or last name.

Address returns Leads . . . . . . containing the address information that you
provide.

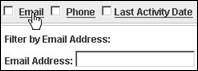
Email returns Leads . . . . . . that have the Email address
you enter.

Phone returns Leads . . . . . . containing as many or
as few area code and phone number characters you enter. A quick way to filter for Leads in a single area code
![]()

Last
Activity Date returns Leads . . . . . . that have had activity logged by the system for
the date you enter.

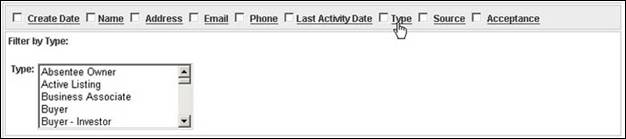
Type returns Leads . . . . . . of the type you select in the list shown.
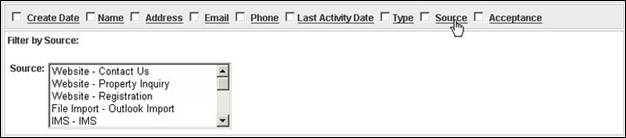
Source returns Leads . . . . . . using the source you
select from the list shown.
A quick way to filter for Leads you have not accepted Acceptance returns Leads . . . . . . based on if you have accepted
or not accepted them, whichever box you check.
![]()

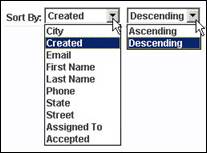
Sorting Leads Return to the top
You may further customize the view of your leads by assigning sorting rules to the search result:
These dropdown lists assign the sorting
criterion and sort order.
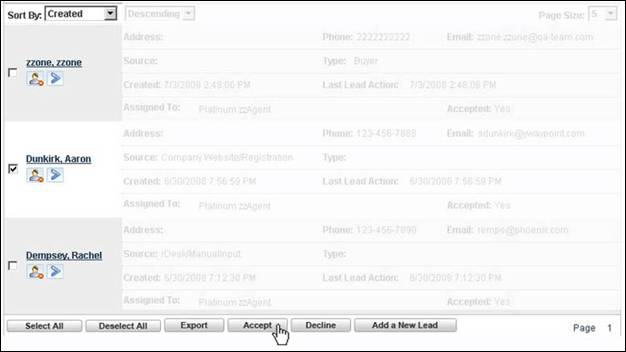
Batch-Processing Leads Return to the top
The buttons along the bottom of the Contacts >> Leads screen enable you to execute the same action on batch‑selected or individual Leads; for example, here you can click the Select All button and export a batch of Leads to an Excel spreadsheet.
Exports to Excel all selected Leads on the Opens a New
Lead Unchecks all checkboxes and deselects all Leads Selects all the Leads on the page by checking the
checkboxes next to all Lead names When you Accept a
Lead, it becomes a part of your Contacts database. Accepts all checked Leads Declines all checked Leads![]()


![]()
page or all Leads in the search
result
(you will be prompted to specify which)
window with
fields for
input


![]()
![]()


Lead Details Return to the top
Clearly, the Lead search
function is a robust tool for narrowing your Leads view based on
your specified search criteria. Once you have your desired list, you can click
on individual
Leads for details on each one.
For example, you to find out more about the Lead Aaron Dunkirk.
Click on Aaron’s name:

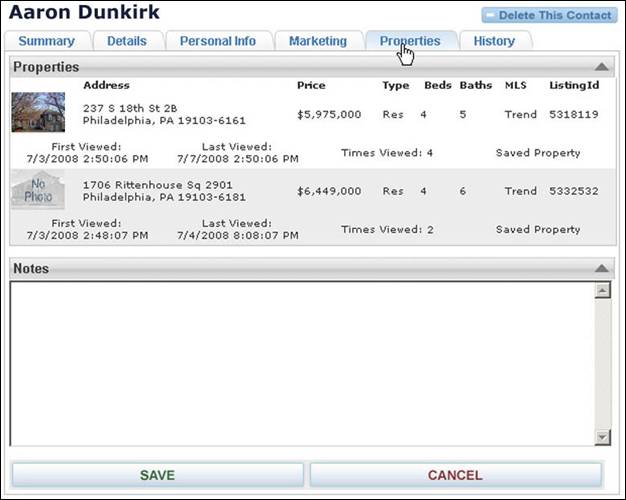
The Summary tab appears, with additional tabs for browsing deeper into each Lead. Here you can also edit and update information about your Lead.
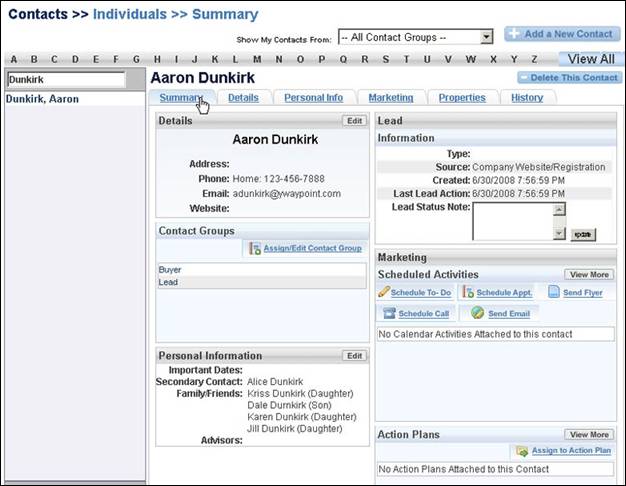
The Marketing tab displays details on the properties your Lead has visited online.
Read Notes you entered, or edit and add ongoing
information here.
![]()
Another powerful data retrieval source is the History tab:
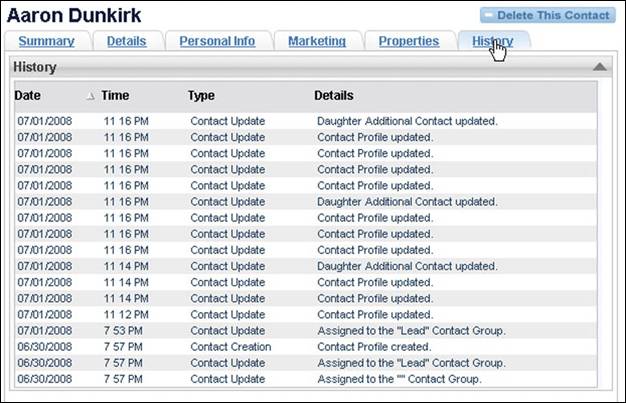
The History tab logs both the various actions you have made for a Lead (contact profile updates, assignment of lead to groups, etc.) and the various actions by the Lead on your website (registered, saved search, filled out a listing inquiry, etc.).
Assigning Leads to Action Plans Return to the top
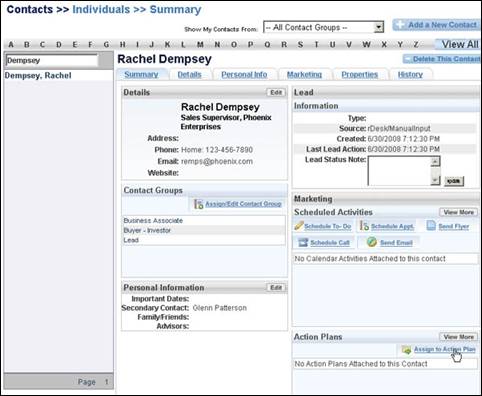
From the rDesk Lead view screen (below), you can manually route an individual lead to an Action Plan (the next section explains automatic routing of leads). Start by clicking on the Lead name:

In the Summary screen for the Lead, click on Assign to Action Plan . . .
![]()
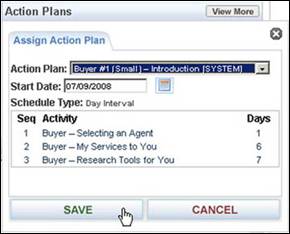
. . . then you can assign the Lead to an Action Plan from the dropdown list:
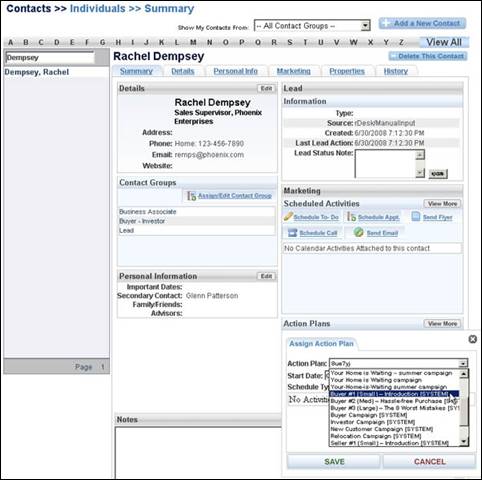
Click Save (left), and the Action Plan will show
up in the Lead summary screen Action Plans list (below).

Instructions up to this point
have been about Lead > View functionality. The next section
explains Leads > Lead Admin functionality.
Leads > Lead Admin Return to the top
The rDesk Lead Admin functionality allows you to route Leads to Action Plans. The Action Plans in this module are currently all Email campaigns.
The Action Plan Manager is a stand-alone module of rDesk, and Leads Admin is where the Leads and Action Plan Manager modules intersect.
Routing Rules Tab Return to the top
To begin Lead admin, click Leads
in the left pane of the rDesk desktop, then click Lead Admin in the
dropdown list as shown by the
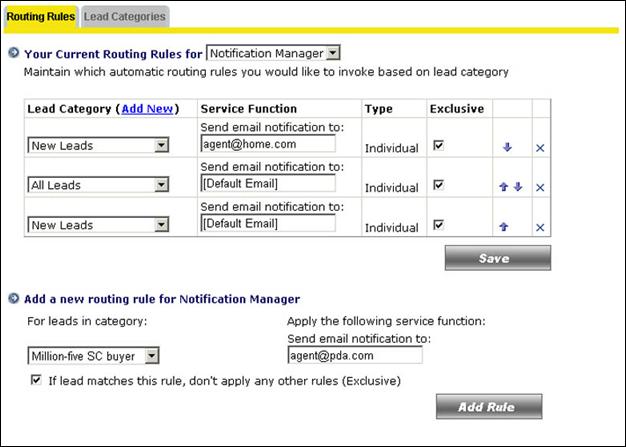
The Routing Rules tab below shows you the routing rules currently
set up.
![]() .
.
Hot
Leads are assigned to the Buyer #2
Action Plan in the System Library.
![]()
![]()
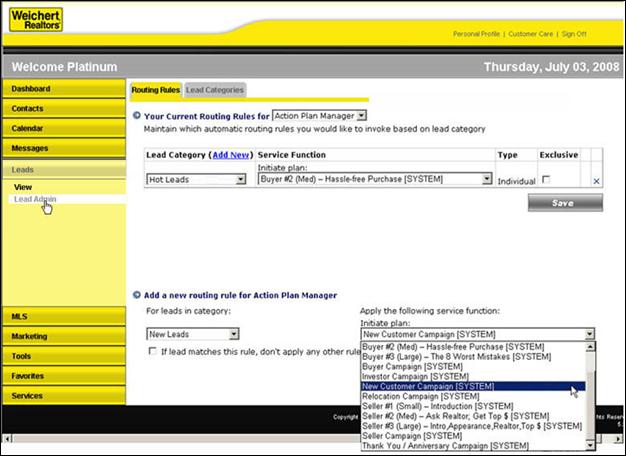
The dropdown after Your Current routing Rules for contains these
two choices: 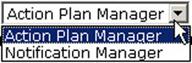
The Notification Manager is a
component of the Action Plan Manager module: Much like the Action Plans you
employ to send Email campaigns to your Leads, Notification Plans send Emails to
you upon receipt of Leads. In the Routing Rules tab below,

 All Leads will trigger Email notifications to
your Default Email address.
All Leads will trigger Email notifications to
your Default Email address.
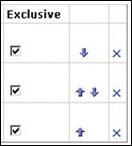
Exclusive means the rule will override any other
rules that apply — that is, any “rule” overlaps You checked this box to make the rule Exclusive. Now you are adding a rule to send notification to your PDA
of new Million-five SC buyer category Leads. Individual Type
![]()
![]()
![]()

(initiated by you).![]()


Lead Categories Tab Return to the top
The Lead
Categories tab allows you to set up customized categories of your Leads,
which will be your
Action Plan recipients.
The example below demonstrates how you can create a lead category using any number of specified criteria.
They provided an Email address, but not necessarily a mailing address. In these zip codes located in greater Charleston, SC. and who are looking to buy property . . . Remember to save your work! and a phone number, homes . . . starting at $1.5 million. This category will include Leads that filled out the
Property Inquiry form on your website . . . They have looked at two or more . . . rather, you are creating a new category. Type in a name
for the new Lead category. Skip this selection. You are not editing an existing
category;
![]()
![]()
![]()
![]()
![]()
![]()
![]()
![]()
![]()
![]()
![]()
![]()
![]()
![]()
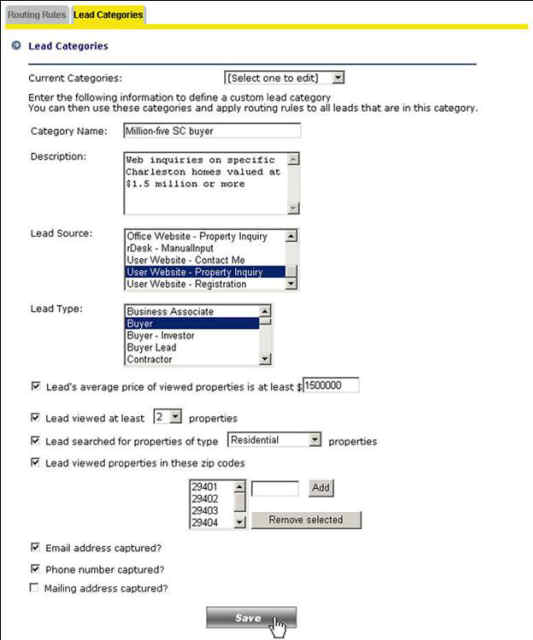
After you click the Save button, your Lead category will appear in the list for future use and future editing. Simply select the Lead category you want to edit in the Current Categories dropdown. An example of future editing would be adding a zip code to the Lead viewed properties… dropdown.

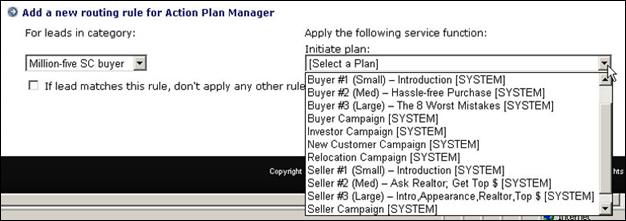
Back in the Routing Rules tab, you will also see your new Lead category among the Leads category selection:
![]()

Your new Lead category appears in the left dropdown . . .
![]()
![]() . . . and you can
select a plan from the right dropdown.
. . . and you can
select a plan from the right dropdown.
Action Plan Manager Return to the top
The rDesk Action Plan Manager allows you to create and manage Activities and Action Plans. You may create, edit, remove, and send or schedule either an individual email (called an Activity) or a whole email campaign (called an Action Plan) for your leads.
Click the links below to jump to specific topics, or scroll through this User Guide for a workflow approach to creating and managing Action Plans.
To enter the Action Plan
Manager, click Marketing in the left pane of the desktop, then click
Action Plan Manager in the dropdown list as shown by the
![]() .
.
Action Plan Manager > Start Return to the top
After you click Marketing > Action Plan Manager, the Start screen is displayed:
Action Plan Manager Start Screen
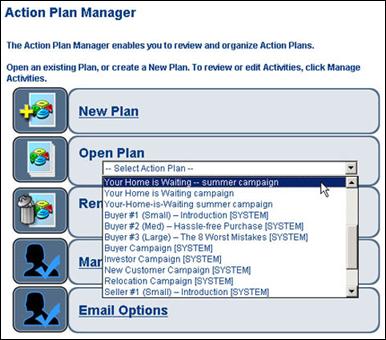
New Plan: Allows you to create New Plans either from scratch or
from existing Action Plans. See New Plan below. Remove Plan: Enables you to select an existing Action Plan from a
dropdown and remove it from your list of Action Plans. Open Plan: Dropdown contains existing Action Plans; you can use
Action Plans as is or modify to create New Plans. See Open
Plan below. Email Options: Set up Email notifications to yourself when a
recipient’s Email bounces or when a recipient opts out of your Action Plan.
See Email Options below. Manage Activities: View and select Activities, and apply themes to Activities
that constitute an Action Plan. Currently, all Activities in rDesk’s Action
Plan Manager are Emails.
See Remove Plan below.
See Manage Activities below.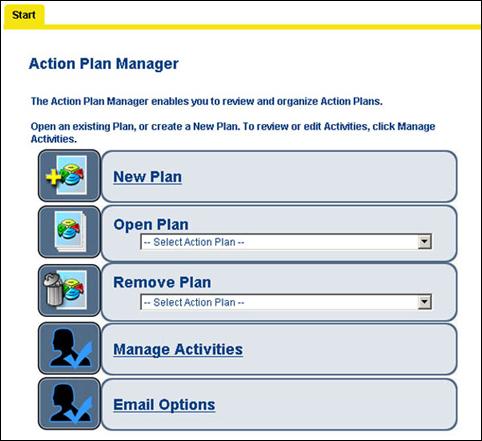
New Plan Return to the top
If you wish to create a new plan, click on New Plan, and the Create Action Plan screen will be displayed. Name your new Action Plan, and select either From Scratch or From an existing Action Plan. Action Plans may be created based on three scheduling types: the calendar-driven method, the recurring method, or the day interval method. All three methods are explained here.
Note: Do not click From an existing Action Plan to create calendar-driven Action Plans and recurring Action Plans if you do not already have existing Action Plans based on these scheduling types. Currently all System plans (explained here) are based on the day interval method, and Action Plans copied from an existing plan automatically inherit that Action Plan’s scheduling method.

The first example below assumes that you wish to create a calendar-driven Action Plan and are creating an Action Plan from scratch.
Creating a Calendar-driven Action Plan Return to the top
After clicking Create Action Plan (above) and selecting the schedule type (Calendar Driven in the example below), you are ready to add Activities.
Add activities in three steps:
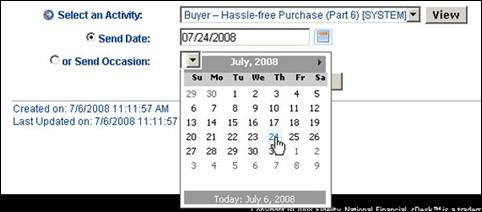
- Select an activity from the Select an Activity dropdown at the bottom of the screen.
- Select either Send Date or Send Occasion, and set the exact date or specific occasion.
- Click the Add Activity to Plan button.
Chosen Activities accumulate in the table, as shown below:
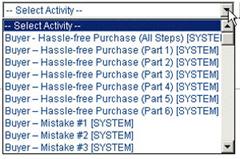
Activities
below are being selected from the Library. But you can also Create New Activities (create your own Emails). Schedule Types Day Interval: Each
activity is sent out “x” days after a previous activity. See Day Interval Action Plan. Calendar Driven Activities
in an Action Plan go out on dates that you specify (i.e., 7/24/08) or at
specified occasions (i.e., Christmas). Recurring An Action Plan containing a single
activity (i.e., a repeating monthly Email) is sent on a recurring
schedule. See Recurring Action Plan. View Activities before
selecting them, or view them here. Select Activities . . . . . . and add them to your Action Plan. Activities from the Library (SYSTEM Activities) have
this lock icon; they cannot be edited.![]()
![]()
![]()
![]()
![]()
![]()

![]()
![]()
![]()
![]()
![]()
![]()

Once you have your Action Plan, it will be included in your existing Action Plan list. You may then create a new calendar-driven Action Plan from scratch or by copying existing Action Plans that are calendar driven using those you have previously created.
Note that only one scheduling method may be used per Action Plan. For example, a combination of day interval and calendar-driven scheduling in one Action Plan is not supported.
Viewing Plan Activities Return to the top
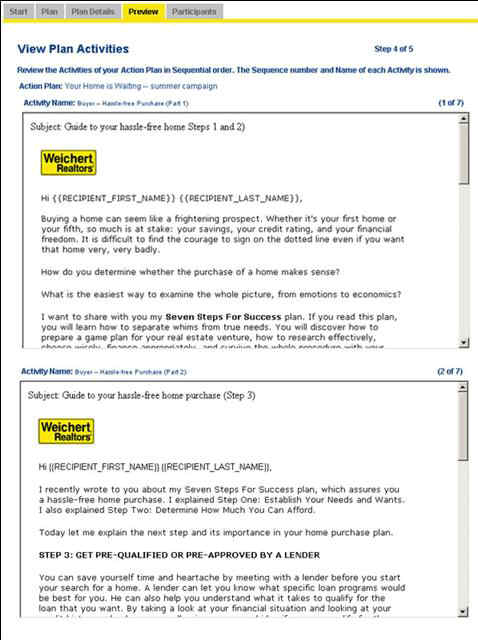
When your Action Plan is built (Activities are added, and intervals and sequence are set), click the right arrow at the top of the screen or the Preview tab to preview the entire Action Plan . . .
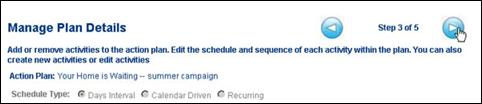
. . . and the View Plan Activities screen is displayed. Here, you can scroll down and preview each activity:
Shown at left are activities
from the Library being added to an Action Plan. You can also create your
own activity, as shown below: You may create new
activities while you are building a new Action Plan or through the Manage
Activities screens. The Manage Activities screens provide powerful
features for creating, editing, previewing, and sending activities. See Manage Activities.
Create
New Activities
Adding Action Plan Participants Return to the top
When satisfied with your Action Plan, click the right arrow at the top of the screen or click the Participants tab to add Contacts . . .

. . . and the Plan Participation screen is displayed:
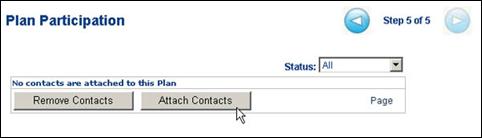
Click the Attach Contacts button . . .
If you get this message . . . . . . wait a few seconds, then click the Participants
tab to refresh the page.
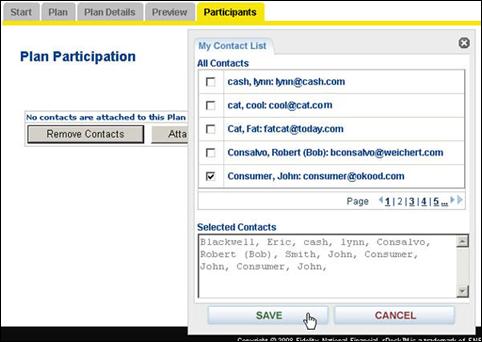
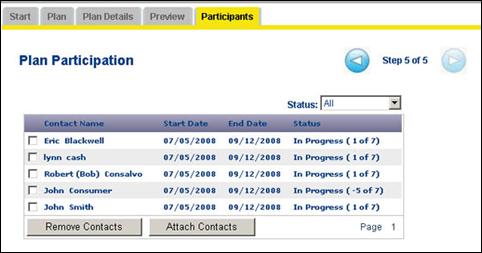
. . . and your Contact List is displayed. Select recipients for
your Action Plan, and click Save. The list of selected Contacts will be
displayed, as shown below.

The Three Ways to Schedule Action Plan Activities Return to the top
The previous section gave in-depth instruction on creating a calendar-driven Action Plan method. Below are all three Action Plan methods explained in sequence, so you can clearly see the distinctions among them.
Day Interval Action Plan Return to the top
Selecting and adding activities based on a Day Interval method uses a similar process as detailed in Creating a Calendar-driven Action Plan. The distinction here is that you place each activity in the sequence desired and set the gap between the activity send dates, as shown below.
. . . and set how many days after the previous one you
wish to send this activity Set when in the series the activity will occur (first,
second, etc.) . . .
![]()
![]()

Calendar-driven Action Plan Return to the top
Selecting and adding activities in a calendar-driven Action Plan is explained in Creating a Calendar-driven Action Plan above. The difference here is that you set the specific date or select a specific occasion for each activity, as show below.
. . . or select an occasion (i.e., a holiday) Set the calendar date for each activity. . .
![]()
![]()
![]()
Recurring Action Plan Return to the top
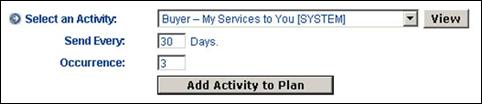
A recurring Action Plan is designed for a single activity, and you set the recurrence of that activity, as show below.
. . . and set the number of occurrence (number of
repeats). Set the frequency of a recurring activity . . .
![]()
![]()
Open Plan Return to the top
Click any existing Action Plan in the dropdown to open it, as shown below to the right . . .
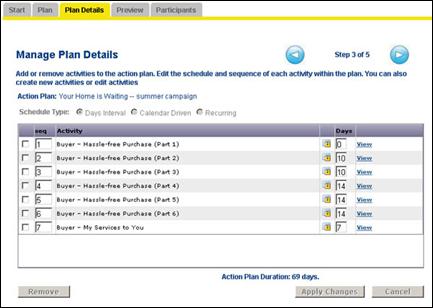
. . . and a list of the
activities that make up the Action Plan will show on the Plan Details
screen:
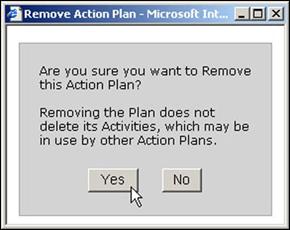
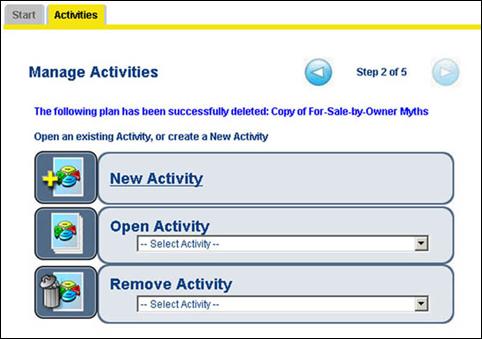
Remove Plan Return to the top
Result of the click at left:
Click any existing Action Plan in the dropdown to remove it, as shown
below to the right:

Manage Activities Return to the top
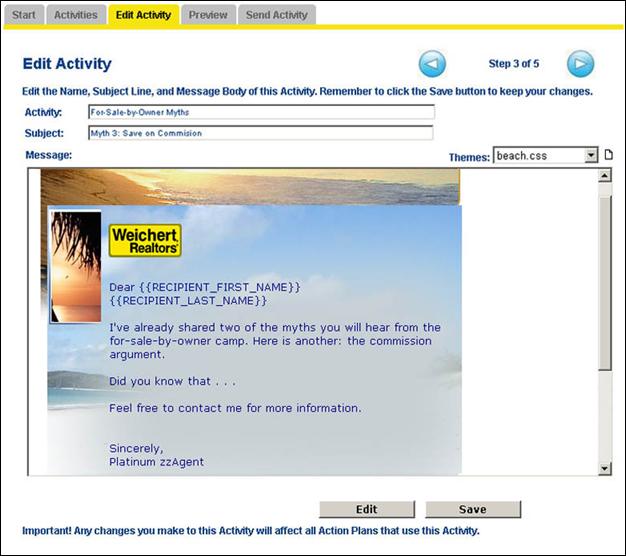
The Manage Activities screens are like the Action Plan Manager screens. The distinction here is that instead of managing your Action Plans, you can manage the activities that constitute your Action Plans. Several graphical themes (i.e., stationery templates) can be applied to individual Action Plan activities to enhance presentation and branding. You can view, select, and apply these themes to new activities or to existing, non-system activities (system activities cannot be modified).

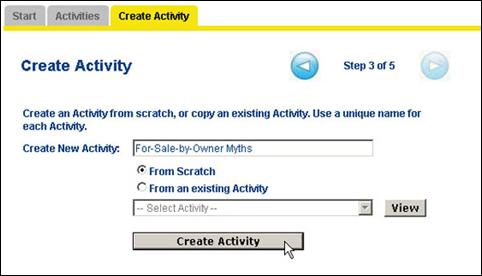
New Activity Return to the top

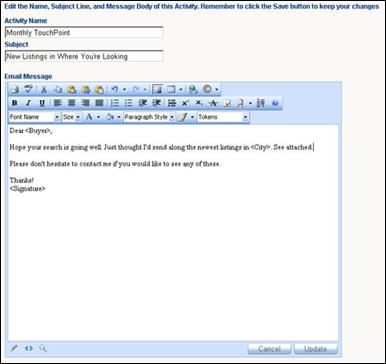
Like the Action Plan screens, the Create Activity screen prompts you for a new activity from scratch or a new activity based on one that already exists.
Below, you are creating a new activity from scratch:
Below is your new activity with the default theme applied:
The Themes dropdown
offers style sheets to lend several thematic appearances to your
activities:
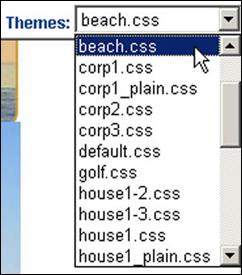
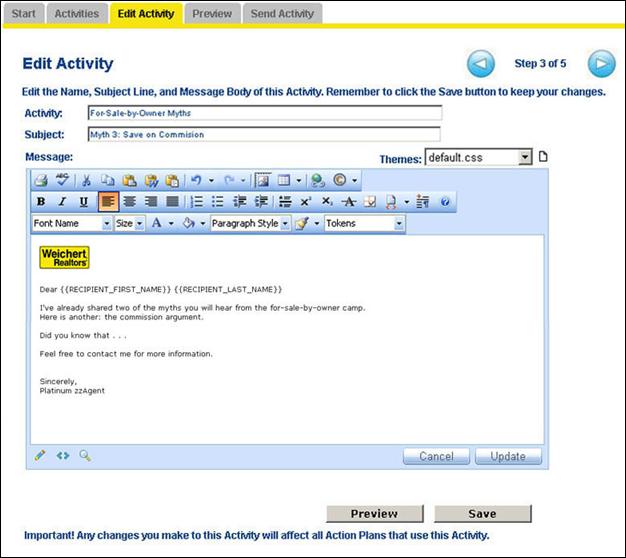
Below is the same activity with the beach theme applied:
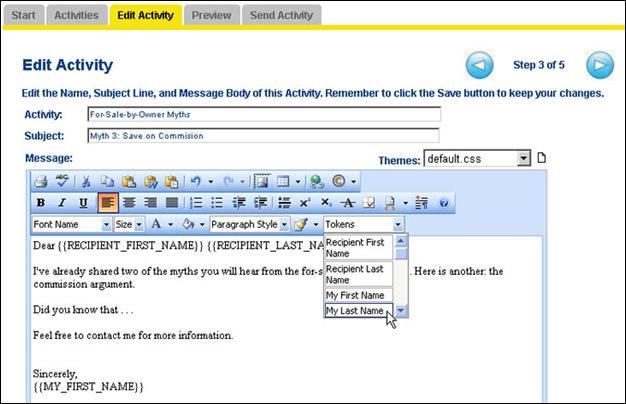
Tokens Return to the top
To automatically place your recipient’s name and your own name in the Email, use the Tokens dropdown, as shown below. Remember to put a space between the {{first_name}} and the {{last_name}}:
manually
inserted
space![]()
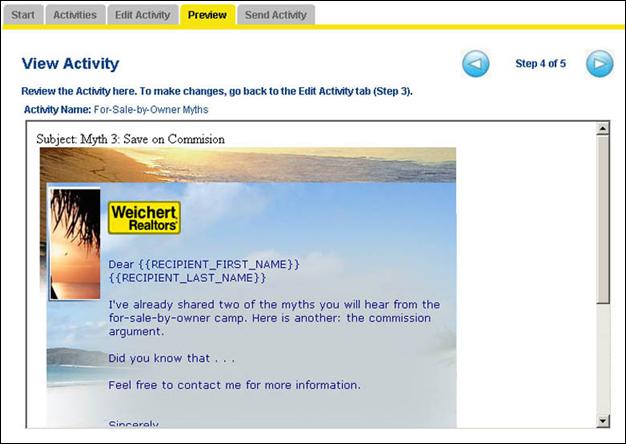
Below, your activity is ready to preview, so you click on the right arrow . . .

. . . for a Preview screen for your new activity:
The preview looks good, so click the right arrow . . .
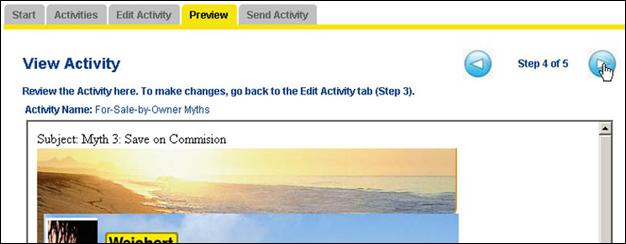
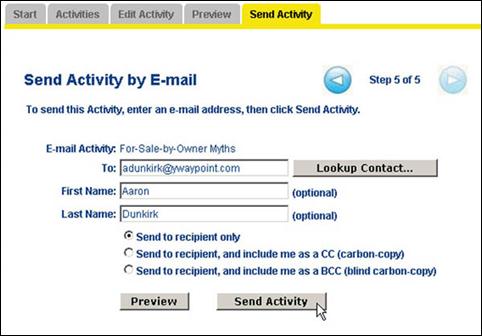
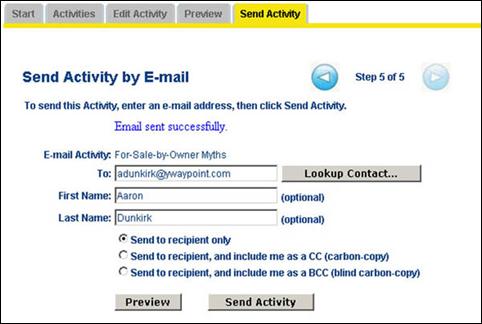
. . . for the Send Activity by Email screen (below). Add contacts, click Send Activity, and your activity has been created and is ready to send:
Confirmation![]()
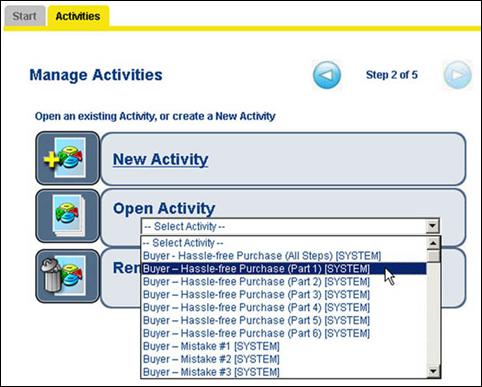
Open Activity Return to the top
The Open Activity dropdown allows you to open an existing activity to send again or to send to different recipients. You cannot change the message without renaming the activity, but you can change the theme of non-system activities and the audience.
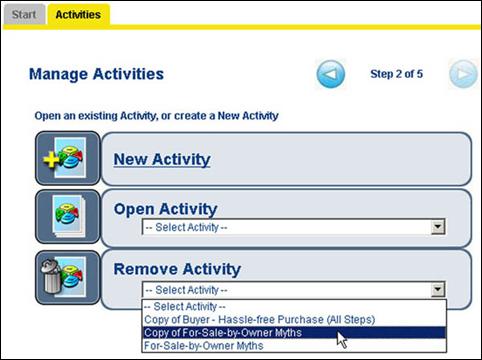
Remove Activity Return to the top
The Remove Activity dropdown allows you to remove non-system activities.
Result of the click at left:

Confirmation
![]()
Email Options Return to the top
Under Email options, you can elect to receive notification when an Action Plan recipient opts out, or when your activity is undeliverable and gets bounced.

This could help you to stay informed real-time about the success or failure of your Action Plans and give you insight into the results of your Action Plans.